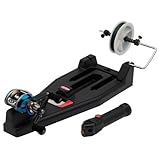
STEP 2: Thread the new
line through the eyes on the pole.
STEP 3: Tie the line to the reel.
STEP
4: Wind the line onto the reel 20 cranks.
STEP 5: Check the line for twists. If
twisted, turn the spool of line over.
STEP 6: Fill the reel to 1/8 inch from the
spool rim.
Tips
If using a closed reel, place a pencil through the center of the spool and have someone hold the
pencil to keep tension on the line.
If using an open-faced reel, lay the spool on the floor
so the line comes off counter clockwise.
In addition to tying all of your knots correctly to connect all
the pieces of your line, it's important to get the line properly loaded onto your rod.
Instructions
STEP 1: Pull about 10 to 12 feet of
line from the reel.
STEP 2: Double-check that the line is running under the line guard on the reel, and that the line
is coming from the bottom of the reel.
STEP 3: Double the loose end of the line over on itself
to make a "U" shape. Then take that doubled end and thread it through the metal guides on the rod. Start with the
thickest guide, at the bottom - this is the stripping guide - and thread up the rod.
STEP 4: Be careful
not to thread the line through the hook keeper on your rod, which will hold the hook of your fly after the pole is threaded.
STEP 5: Make sure you've threaded every guide and that the line isn't twisted around the pole. This
is also a good time to ensure that your guides are lined up. If the line bends around the pole, take the line out and pull
your pole apart and reconnect the pieces to ensure that the guides line up.
STEP 6: Look at the guides for burrs
when you are threading your line. These can wear your line out and eventually cause it to snap. If you see any rough spots,
it's time to file the guide to eliminate them.
STEP 7: Check to make sure you didn't miss anything by holding
the line in one hand and the rod in the other hand and bending the rod. Any missed guides can be easily spotted.